


To help you build a clear and actionable implementation plan, we present the 4-phase Product information management implementation guide.

After identifying the need for a PIM in your organization, getting your PIM team together, and choosing the right PIM tool for you, you are now ready for implementation.
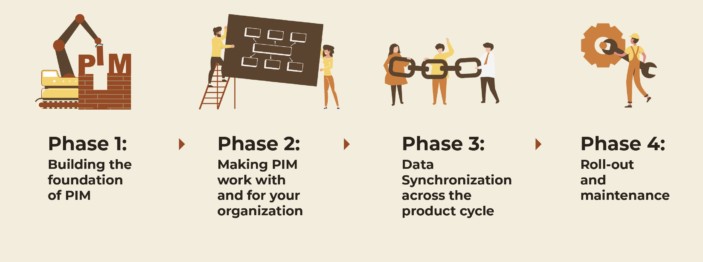
4 Phases of PIM Implementation
Without a proper plan in place, your PIM implementation runs the risk of becoming ineffective and all the legwork go in vain. But it doesn’t have to. To help you build a clear and actionable implementation plan, we present the 4-phase PIM implementation guide.
Phase 1: Build the foundation of PIM
While starting on your PIM strategy, you would have identified the data sources and the media. You would have also discovered the data flow — from data origination to publishing and then to decommissioning. This information will come in handy in phase 1 where you configure your PIM.
Configure PIM
In this step, define the data model of your PIM — configure the various attributes and attribute groups that your products require. Attributes are features or information about a product. Attribute groups are a collection of a type of product information. Take a shirt, for example, the attributes batch number and manufacturing date can be grouped under the attribute group of “manufacturing” while attributes color and pattern of the shirt can be grouped under the attribute group “style”.
Then, configure the list of values (LOV) and the LOV group. Defining LOVs will ensure consistency in your product data. Say the attribute “color” for the shirt has LOVs like red, green and blue, the product data for that attribute cannot go beyond the specified color, so there can be no “sky blue” tagged for the shirt’s color.
Then, configure the various catalogs that your organization will typically publish.
Also, configure users and user groups, define who has access to what data and ensure that this is in line with your data governance policies.
Configure the integration points
After getting your data model in place, configure inbound and outbound integrations for your PIM. Make your PIM the single, integrated and consistent view of product data across the organization.
Make sure that all the sources of data such as ERP, 3rd party supplier systems (EDI), FTP storage, etc., are identified and connected to the PIM. Ensure your PIM supports various file types and formats. Don’t forget to integrate the endpoints where the product data will be published —typically systems like print servers, CMS for ecommerce portal, website, RFID systems.
Phase 2: Customise PIM for your needs
With the foundations of your PIM set, we now move to phase 2 where we customize the PIM for your organization. Each organization is unique in the way they work, and the PIM needs to accommodate that way of working.
Set up the business rules and workflow
Define business rules — when would you consider a product fit to be published across different media; who would review the product information etc. For instance, completing 80% of the data attributes accurately can push a garment product to the website while a home appliance might need 90% of the product data to be completed.
Next is the workflow for various levels of your PIM — product onboarding and maintenance etc; it might even vary between the different brands that you own/operate. For example, the approvals required to update a product data might be different from approvals while onboarding the product for the first time.
Configure UI for workflows and product preview
Now, configure the PIM user interface (UI) for various functions and user roles — administrator workflow might need an eagle’s eye view of the processes, while data operators UI might need a more specific view. The UI can also be different based on the workflow — an onboarding workflow might need all the attributes in an editable mode whereas, the maintenance workflow only needs newly updated values in the edit mode.
Also build the product preview components to see the product as your customer would see it. This will help product owners identify errors or other information missing from the customer’s view.
Phase 3: Synchronize data throughout the product cycle
Now that you’ve set up your PIM, it is time for a trial run—from data ingested at various sources to publishing them across media.
Interface digital assets and data
Test inbound integrations — test data and digital assets for the products collated in the PIM. Test all the assets linked to the products and the data runs through the workflow defined in Phase 2. Also test how the information is published across the outbound integrations—ecommerce website, information for product support teams, print catalogs, RFID systems, etc. Analyze and fix data leakage and linking issues if any.
Onboard suppliers and users
Getting the suppliers and users onboard will help understand real-world usage of the PIM before it is rolled-out. Train your suppliers and users on leveraging your PIM. Apprise suppliers of any changes to the data format that needs to be done before they start sending information to your PIM. This will help identify any data validations that may have been missed in the configuration stage. Assign user to roles and check their access levels too.
Phase 4: Roll-out and maintenance
You’ve now ticked all the boxes—set up the PIM, customized it to your needs, integrations tested, users trained and onboarded. It’s time to roll-out your PIM in production.
User acceptance testing
As with any IT system implementation, the PIM should also be tested. Simulate all scenarios (user stories) in production with users at each level signing-off upon successful testing. Test all automated workflows right from product data approvals to publishing to marketing campaigns and get approvals from relevant technical and business users.
Globalization and production cut-over
Configure localization requirements in case the PIM is to be used across different geographies. Once the testing is satisfactory, declare PIM production-ready and go live!
You’re not all done yet. The PIM system then goes into maintenance phase where incremental changes are done on the fly without disrupting the business. The foundation you’ve laid by implementing PIM will make data management easier and efficient for your business.
While the steps are neatly laid out in phases, we understand it is no cakewalk. We’re here to help you implement PIM in your organization. Talk to our consultants now!